Perlin Noise
A technique for generating random noise that produces more natural appearing textures and images.
What is Noise and Randomness?
When an algorithm is used to generate an image, it will always produce the exact same results if it is given the same starting parameters. Sometimes this is desired, but often the artist wielding the algorithm will want to introduce some randomness in order to produce an interesting variety of pictures.
For example, suppose an artist wants to generate natural looking textures like wood grain, marble, or fabric. If every piece of wood looked identical, or if you could see a repeating pattern in the grain, the resulting image will look unnatural. However, if noise is introduced to give each texture a unique appearance, then the final image will have more variety and interest.
Noise can also be used for procedural generation of content in movies or video games. For example, the terrain, clouds, grass, tree branches, and even the layout of a city map could be generated using noise as one of the input variables. Each time the artist presses a button, an entire new world can be rendered.
Random vs Perlin Noise
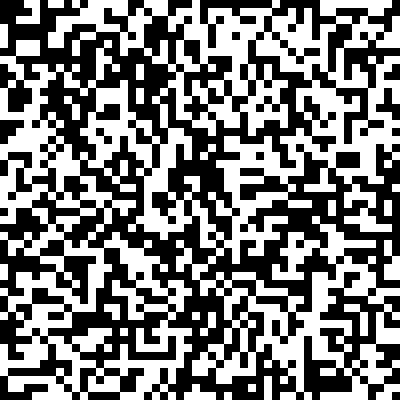
The easiest way to introduce noise into an image is to use a random number generator. A good random number generator will produce numbers without any predictable pattern. These numbers can then be used to draw part of the image. A good example of this is the static you might see on an antique analog TV when not tuned into a station (see image 1). This is often called "white noise". In this example, each pixel is colored either black or white according to a random number.
Totally random noise is sometimes useful in computer graphics, but it often makes images look blocky and unnatural.
For many applications it may look better to have noise that has a smoother texture with more discernible features. This is where Perlin noise comes in. It is a type of "gradient noise" invented by legendary programmer Ken Perlin while working on the Tron motion picture in the 1980s. It works by generating random values at different points in a grid, and then smoothly blending those values together. This gives the resulting image a more natural and organic look, rather than the pixelated and artificial look of regular random noise.
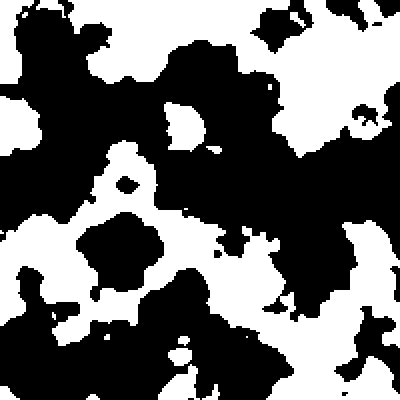
For example, in image 2, Perlin noise was used to color the pixels either black or white. Notice how some patterns and shapes emerge from the random data.
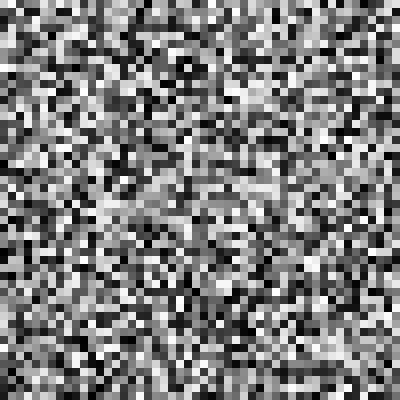
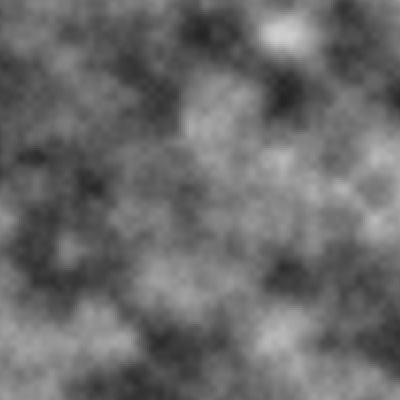
In these examples, we have generated noise in black and white, but you can generate noise in various shades of grey as well (see images 3 and 4). In this example, the random white noise doesn't look much different than its black and white companion, but the Perlin noise looks different. Here, the color of each pixel isn't clamped to a white or black value, but is allowed to smoothly vary throughout the image. You can see how this type of noise could be used in 3D computer graphics to generate natural looking features, such as clouds or grass.
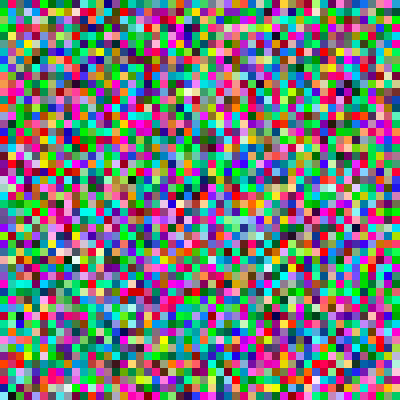
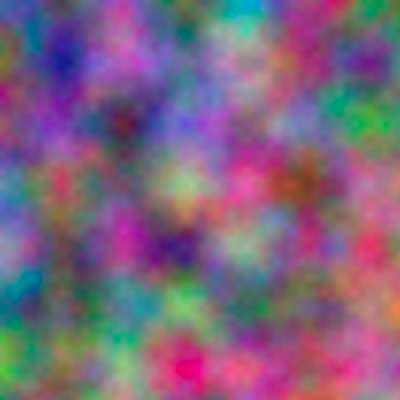
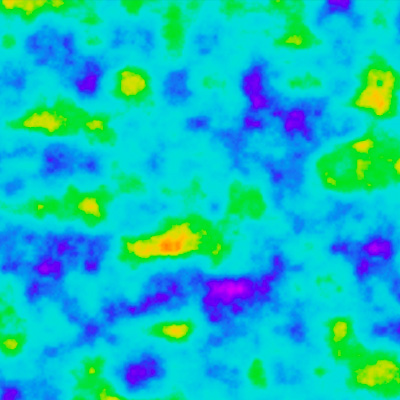
It is also worth noting that noise can be generated in dimensions other than 2D. It can be used in 3D or higher dimensional spaces to generate noise for different purposes. It doesn't necessarily need to be for 3D computer graphics. For example, in image 6, Perlin noise was used to create a color gradient. The X and Y coordinates of each pixel in the 2 dimensional image were used for the first two dimensions. Because a pixel's color is made of three components (red, green and blue), the third dimension was used to extract a different value for each color, which was combined to make the final colors that you see here. Image 7 shows what perlin noise would look like if a colored gradient palette was used instead of greyscale as in image 4.
If the artist is producing an animation or video, one of the extra dimensions can be time. This would allow the noise to vary smoothly as the video plays. A natural looking flame animation could be produced in this way.
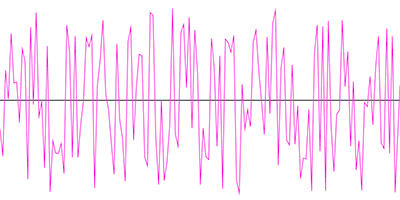
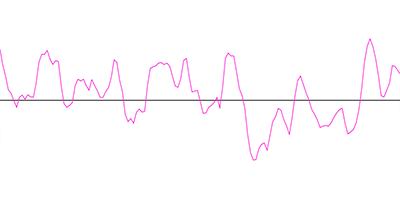
Perlin noise can also be used in 1D space to create a smooth variation along one axis of movement. In images 8 and 9 here, you will see the difference between random noise and Perlin noise when generated in one dimension. As you can see, the Perlin noise algorithm generates values with a smooth flow from one value to the next along an axis. This could be used for various purposes. For example, if you are using an algorithm to draw a piece of coiled string, you might use one dimensional noise to determine how much that string wiggles left and right. It would look more natural if Perlin noise was used.
Other Types of Noise
Perlin noise is a popular algorithm, but there are other algorithms for generating digital noise that may work better for different purposes. Here is a quick list of some alternatives with some links to learn more about them.
Technical Details of Perlin Noise
Using the interactive noise generator at the top of the page, you can experiment with different types of noise, and compare the difference between random noise and Perlin noise. You will notice that there are three input parameters that can be used to alter the results of the noise function.
Perlin noise is computed by summing together several layers of noise, called octaves. Each octave contributes some detail to the overall value at a particular point. Generally, each successive octave contributes less and less to the result. This means that lower octaves contribute mostly to the overall texture and the higher octaves effect finer-grained details. The amount that each subsequent octave contributes to the whole is called the "falloff".
The output of a Perlin noise function will be a decimal number between 0 and 1.
- Scale - This parameter controls the overall size of the noise. Essentially, you are zooming in or zooming out through the overall noise map. When the scale is decreased the features become closer together and more complex. When the scale is decreased, the features get spread out and appear smoother.
- Octaves - By adjusting the number of octaves of noise that are layered together, it's possible to create a wide range of different patterns and textures. Increasing the number of octaves can add more detail and complexity to the noise, while decreasing the number of octaves can make the noise appear simpler and may have some repeating patterns.
- Falloff - This parameter controls how much each successive octave contributes to the whole. For example, if the value is set to 50% then each octave will contribute half as much as the previous octave. If this number is set very low, then higher octaves will have very little impact. If this number is set very high, then all of the octaves will contribute an equal amount. It should be noted that any value over 50% can cause the Perlin noise function to return values greater than 1, which will often be clamped to 1 and can produce unwanted effects.
The actual code to generate Perlin noise is not too complicated. Below is an example from the popular p5.js Javascript library.
  const PERLIN_YWRAPB = 4;
  const PERLIN_YWRAP = 1 << PERLIN_YWRAPB;
  const PERLIN_ZWRAPB = 8;
  const PERLIN_ZWRAP = 1 << PERLIN_ZWRAPB;
  const PERLIN_SIZE = 4095;
  const scaled_cosine = i => 0.5 * (1.0 - Math.cos(i * Math.PI));

  let perlin_octaves = 4; // default to medium smooth
  let perlin_amp_falloff = 0.5; // 50% reduction/octave

  p5.prototype.noise = function(x, y = 0, z = 0) {
     if (perlin == null) {
        perlin = new Array(PERLIN_SIZE + 1);
        for (let i = 0; i < PERLIN_SIZE + 1; i++) {
           perlin[i] = Math.random();
        }
     }

     if (x < 0) {
        x = -x;
     }
     if (y < 0) {
        y = -y;
     }
     if (z < 0) {
        z = -z;
     }

     let xi = Math.floor(x),
        yi = Math.floor(y),
        zi = Math.floor(z);
     let xf = x - xi;
     let yf = y - yi;
     let zf = z - zi;
     let rxf, ryf;

     let r = 0;
     let ampl = 0.5;

     let n1, n2, n3;

     for (let o = 0; o < perlin_octaves; o++) {
        let of = xi + (yi << PERLIN_YWRAPB) + (zi << PERLIN_ZWRAPB);

        rxf = scaled_cosine(xf);
        ryf = scaled_cosine(yf);

        n1 = perlin[of & PERLIN_SIZE];
        n1 += rxf * (perlin[(of + 1) & PERLIN_SIZE] - n1);
        n2 = perlin[(of + PERLIN_YWRAP) & PERLIN_SIZE];
        n2 += rxf * (perlin[(of + PERLIN_YWRAP + 1) & PERLIN_SIZE] - n2);
        n1 += ryf * (n2 - n1);

        of += PERLIN_ZWRAP;
        n2 = perlin[of & PERLIN_SIZE];
        n2 += rxf * (perlin[(of + 1) & PERLIN_SIZE] - n2);
        n3 = perlin[(of + PERLIN_YWRAP) & PERLIN_SIZE];
        n3 += rxf * (perlin[(of + PERLIN_YWRAP + 1) & PERLIN_SIZE] - n3);
        n2 += ryf * (n3 - n2);

        n1 += scaled_cosine(zf) * (n2 - n1);

        r += n1 * ampl;
        ampl *= perlin_amp_falloff;
        xi <<= 1;
        xf *= 2;
        yi <<= 1;
        yf *= 2;
        zi <<= 1;
        zf *= 2;

        if (xf >= 1.0) {
           xi++;
           xf--;
        }
        if (yf >= 1.0) {
           yi++;
           yf--;
        }
        if (zf >= 1.0) {
           zi++;
           zf--;
        }
     }
     return r;
  };
Further Reading
To learn more about the technical details behind generating pseudorandom noise for computer graphics, check out these references.